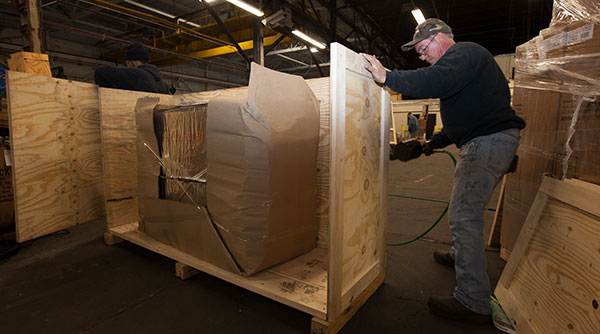


Blocking and bracing is the practice of securing cargo inside a shipping container, trailer or railcar with lumber, dunnage and lashings so it cannot slide, tip or shift in transit. Blocking fills the space against the cargo. Bracing carries the cargo’s load to the container’s structure. Together they have to hold against the forces the CTU Code sets for road and sea.
TL;DR
- Container blocking and bracing has to resist forces as high as 0.8 g forward under road braking and 0.8 g sideways in rough seas, the design values in the IMO/ILO/UNECE CTU Code.
- Plan the load before the container arrives: confirm the container’s ratings, place the center of gravity near mid-length and low, and declare the verified gross mass.
- Use ISPM-15 heat-treated and marked lumber and dunnage on every export shipment, or the cargo can be held at the destination port.
- Block the base in every direction, brace tall or top-heavy items against tipping, and lash heavy items only to points rated for the load.
- Flat racks and open tops shift almost all of the restraint onto lashings and deck blocking.
- Inspect against a checklist, photograph the stow and record the seal number before the doors close.
A container ship rolling in heavy weather, a truck braking hard on the way to the port, a railcar coupling in a switching yard: each one tries to move cargo that is not secured against it. Cargo that moves a few inches gains momentum, breaks its own blocking, and either damages itself or loads the container walls and doors in ways they were never meant to take.
Most container damage traces back to a securing plan that was guessed on loading day. The forces cargo sees in transit are documented, the lumber and lashing rules are documented, and the inspection steps are simple. The work goes wrong when the plan starts after the container is already at the dock.
This guide walks through securing heavy cargo for ocean shipping in seven steps, from load planning through the final check before sealing. It is written by Bentley World-Packaging, which blocks, braces and loads containers, including flat racks and open tops, from its packaging facilities in Milwaukee and Baltimore.
What is the difference between blocking, bracing and lashing?
Blocking stops cargo from sliding by placing lumber or fillers directly against it. Bracing stops cargo from moving or tipping by transferring its load to a strong point on the container through a structural member. Lashing ties cargo down to rated anchor points with straps, chains or wire. Most heavy loads use all three, plus friction mats underneath.
Defined Term: Dunnage
Loose lumber, timbers, bags or fillers used to support, block, separate or protect cargo inside a container. Solid wood dunnage on international shipments falls under ISPM-15 and has to be treated and marked.
The table shows what each securing method does and when it is the right tool.
| Method | What it does | When it applies | Watch for |
|---|---|---|---|
| Blocking | Lumber nailed or fixed to the floor directly against the cargo to stop sliding | Every load with a gap between cargo and container walls or doors | Blocks must bear on the cargo’s strong points, such as skid runners, base frames or crate framing |
| Bracing | Diagonal or horizontal lumber that carries cargo load to the container frame or floor | Tall, top-heavy or heavy items that could tip or push through blocking | Braces need a solid seat at both ends and a shallow enough angle to carry load |
| Lashing | Straps, chains or wire rope tied from the cargo to rated anchor points | Heavy machinery, flat racks, open tops and any cargo that blocking alone cannot restrain | Lashing capacity and anchor point ratings must exceed the load the lashing carries |
| Friction mats | High-friction mats under the cargo that reduce how much restraint the other methods must supply | Heavy items on smooth bases, and as a supplement on most machinery loads | Plan the restraint so it still holds if friction is lower than expected |
| Void fill and dunnage bags | Airbags, honeycomb or lumber that fill gaps between cargo units | Mixed or palletized loads with spaces between units | Bags are for voids between units; heavy machinery and the door end need blocking or lashing |
Bentley World-Packaging builds blocking, bracing and dunnage systems as part of its export packing work, along with custom skids and crates designed for ocean containers. The same methods apply whether the cargo is crated, on a skid, or a bare machine.
What forces does cargo face in a shipping container?
Cargo in a shipping container has to be secured against accelerations of up to 0.8 g forward under hard road braking and up to 0.8 g sideways in unrestricted ocean conditions. Those design values come from the IMO/ILO/UNECE Code of Practice for Packing of Cargo Transport Units, known as the CTU Code.
Defined Term: CTU Code
The IMO/ILO/UNECE Code of Practice for Packing of Cargo Transport Units (2014). It is the international guidance for packing and securing cargo in containers, trailers and other transport units, and it sets the design accelerations a securing arrangement has to withstand by mode of transport.
The CTU Code expresses forces as a share of gravity. A value of 0.8 g sideways means the securing arrangement, together with friction, has to resist a sideways force equal to 80 percent of the cargo’s weight. The code’s values by mode:
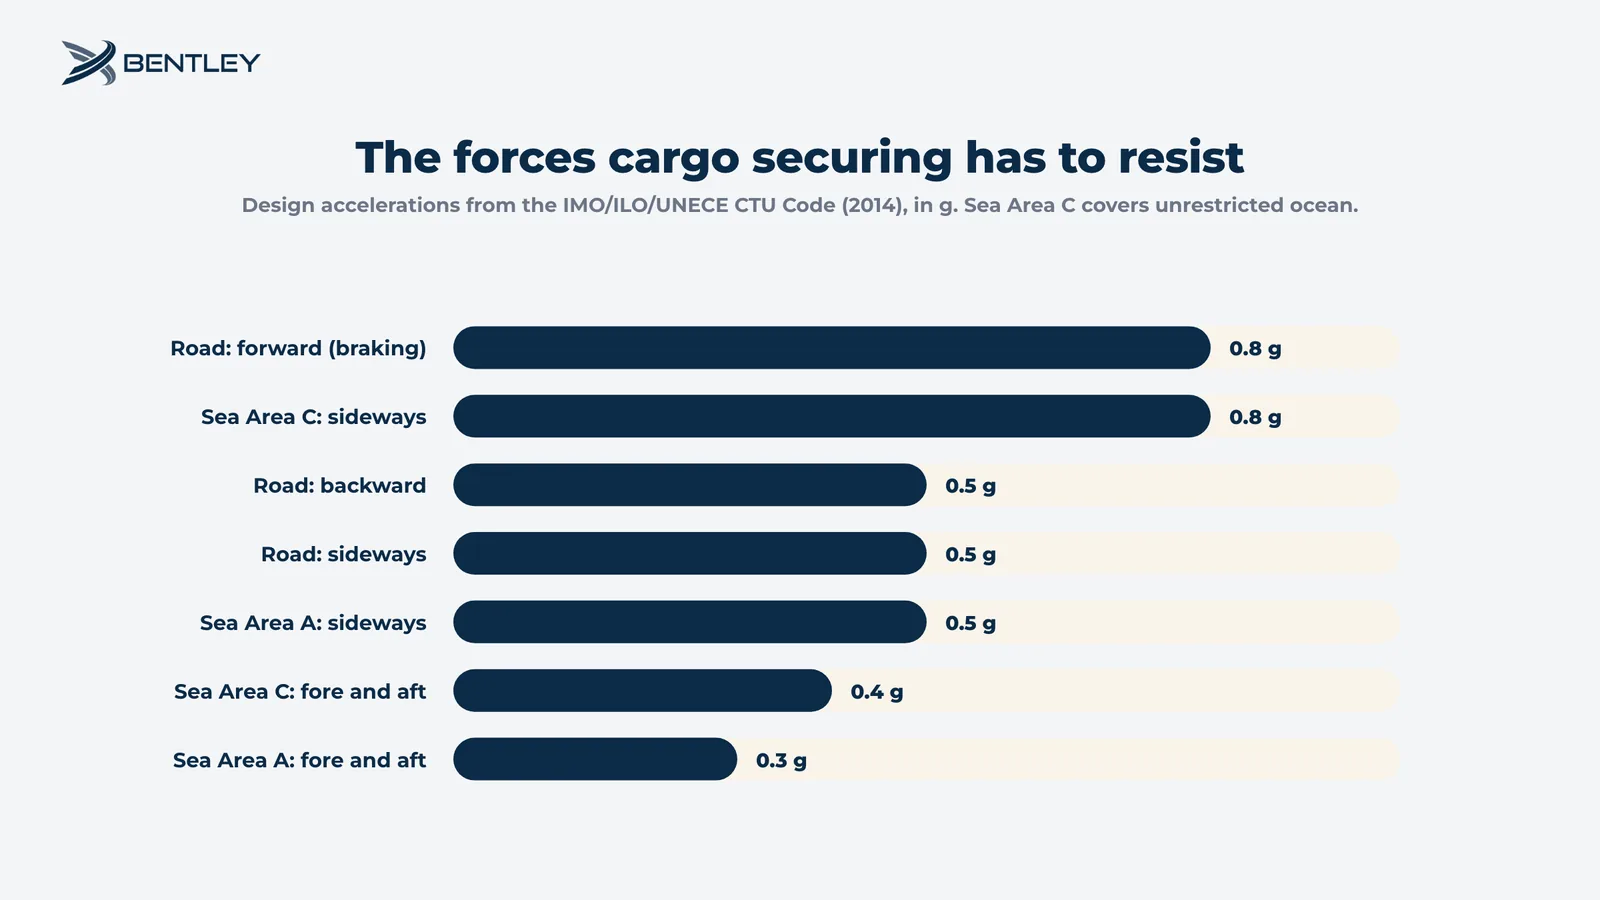
- Road: 0.8 g forward, 0.5 g backward and 0.5 g sideways.
- Sea Area A (the calmest category, significant wave height up to 8 m): 0.3 g fore and aft and 0.5 g sideways.
- Sea Area C (unrestricted ocean, significant wave height above 12 m): 0.4 g fore and aft and 0.8 g sideways.
Two points follow from those numbers. A container crossing an ocean needs its strongest sideways restraint, because rolling produces the largest sideways forces at sea. The same container also travels by truck at each end, so it needs strong forward restraint at the front wall for braking. A plan built only for the ocean leg can fail on the drive to the port.
Rail adds a different risk. Switching and coupling produce sharp fore-and-aft impacts, and US railroads publish their own intermodal blocking and bracing guidance. Union Pacific’s guidance, for example, makes clear that the shipper is responsible for choosing the methods that keep cargo from damaging itself or the rail equipment.
Step 1: Plan the load before the container arrives
Plan the load on paper before the container reaches the dock: confirm the container type and its ratings, place the center of gravity, check the verified gross mass, and draw a load plan with every securing point marked. With the plan done ahead, loading day is a matter of following it.
Confirm the container type and read the CSC plate
Confirm whether the cargo goes in a standard dry container, a high cube, an open top or a flat rack, and read the container’s CSC safety approval plate for its maximum gross mass and tare weight. The difference is the payload limit, and the plan cannot exceed it. Note the location and rating of the anchor and lashing points as well. ISO 1496-1 sets minimum ratings of 1,000 kg for anchor points and 500 kg for lashing points in any direction, and individual containers can be rated higher, so check the actual container.
Place the center of gravity near mid-length and low
Lay out the cargo so the combined center of gravity sits close to the middle of the container’s length and width and as low as possible. Put the heaviest items on the floor and lighter items above them. A center of gravity pushed toward one end overloads one end of the chassis on the road and makes the container awkward to lift. Spread concentrated loads, such as machine feet, across the floor with bedding timbers so no single point exceeds what the floor can carry.
Declare the verified gross mass
Under the SOLAS convention, a packed container needs a verified gross mass (VGM) declared before it can be loaded onto a ship. Weigh the packed container, or weigh the cargo, packing and securing materials and add the container’s tare. Build the VGM step into the plan so it does not hold the container at the terminal.
Draw the load plan
Make a one-page load plan that the loading crew can follow without asking questions. It should show:
- Each item’s position, dimensions and weight.
- The combined center of gravity.
- Every blocking location, with lumber size.
- Every brace, with its angle and both seating points.
- Every lashing, with its anchor point and rated capacity.
- Any friction mats and void fill.
- The door-end gate or bulkhead.
Step 2: Choose lumber and dunnage that will clear customs
Use sound, dry lumber sized for the load, and make sure every piece of solid wood in an export container is treated and marked under ISPM-15. Untreated or unmarked wood packaging and dunnage can lead to the shipment being held, treated or sent back at the destination.
Treat and mark all solid wood for export
ISPM-15, the international standard for wood packaging material, requires solid wood packaging and dunnage to be debarked and either heat treated (the HT treatment, a core temperature of at least 56 °C for at least 30 minutes) or fumigated, and then marked with the IPPC compliance mark. Loose dunnage carries its own DUN marking code. Manufactured wood such as plywood and OSB falls outside the standard. Bentley’s wood packaging is ISPM-15 certified and stamped, and its export crates use ISPM-15 heat-treated wood. The Importance of ISPM 15 Compliance covers the standard in more detail.
Select lumber for the load it carries
Pick lumber that is straight, dry and free of large knots, splits or wane at the points that will carry load. Size blocking and bracing to the weight it restrains: a heavy machine needs larger timbers and more of them than a pallet of boxed goods. Where a single block takes a large share of a heavy item’s load, use several pieces fastened together, and back them up with lashing.
Stage the materials before loading starts
Cut and stage the lumber, dunnage, friction mats, straps and fasteners before the container arrives. Count against the load plan. Crews that run short of material mid-load are the ones that skip a brace.
Step 3: Block the cargo against movement in every direction
Block each item at its base against forward, backward and sideways movement, fill every void that would let cargo travel, and build a gate at the door end so nothing can rest against the doors. Blocking is the first line of restraint for nearly every container load.
Block the base first
Fasten floor blocking against the base of each item on all sides that face open space. Where the container’s wooden floor and the line’s rules allow it, nail the blocks into the floor. Place blocks against the strongest part of the cargo, such as skid runners, a machine base or crate framing. Thin panels, valves and fittings break before they stop the load.
Fill every void that would let cargo travel
Fill gaps between items, and between items and the walls, with lumber, honeycomb fillers or dunnage bags sized for the gap. Cargo that can travel even a short distance builds momentum before it hits the next item or the wall. Inflate dunnage bags to the maker’s rated pressure and keep them away from sharp edges and from the door end.
Build a gate at the door end
Install a gate or bulkhead across the door end so the last row of cargo is held by the gate and the doors carry none of the load. Container doors are not designed as a cargo restraint, and cargo resting against them is a hazard to whoever opens them at destination.
Have cargo that has to arrive intact and compliant?
Tell us what you are shipping and where it is going, and our team in Milwaukee or Baltimore will plan the blocking, bracing and container load.
Step 4: Brace tall or top-heavy cargo against tipping
Brace any item whose height is large relative to its base, because a sideways force that would only slide a low item can tip a tall one. Bracing carries that load to the container’s frame or floor before it can overturn the cargo.
Check whether the item can tip
Compare each item’s base width with its height. For an item with its center of gravity in the middle, a sideways acceleration tips it once the acceleration, in g, exceeds the ratio of base width to height. At the 0.8 g sideways value for Sea Area C, an item standing more than about 1.25 times as tall as it is wide will tip unless it is braced or lashed. If the center of gravity sits high or off center, the item tips sooner.
Brace to strong points at both ends
Run braces from a strong point high on the cargo, such as a crate’s top frame or a machine’s structural member, down to a solid seat on the floor blocking or the container frame. Keep the brace angle shallow enough that it carries load along its length, and fasten both ends so the brace cannot slip out under vibration.
Brace items against each other only when both can take it
Bracing two items against each other works when both are structurally sound and similar in height. Bracing a tall, light crate against a heavy machine moves the load onto the crate. Brace each item to the container structure when in doubt.
Bentley World-Packaging builds blocking, bracing and dunnage systems as part of its export and domestic packing service, together with crates designed for ocean containers and heavy duty skids.
Step 5: Lash heavy items to rated points
Lash heavy items with straps, chains or wire rope whose rated capacity, and whose anchor points’ rated capacity, exceed the load each lashing has to carry. Lashing is the main restraint for heavy machinery and for any cargo on a flat rack or open top.
Match every lashing to its anchor point
Check the rating of each anchor point you plan to use before you tie to it. A lashing rated far above an anchor point is only as strong as the anchor point, and ISO 1496-1 minimums are 1,000 kg for anchor points and 500 kg for lashing points. Spread the load of a heavy item across several anchor points.
Set lashing angles and tension
Run lashings at angles that restrain the item in the direction you need. A lashing pulling mostly downward adds friction, while a lashing angled toward the direction of the force restrains movement directly. Tension lashings evenly so no single lashing takes the full load first, and use edge protectors where a strap crosses a sharp corner.
Put friction mats under heavy items
Place friction mats between heavy items and the floor or deck. Higher friction reduces the restraint the blocking and lashing have to supply, which matters most for heavy machinery on smooth steel bases. Mats supplement blocking and lashing, and the plan should still hold if friction is lower than expected.
Defined Term: Friction mat
A high-friction rubber or composite mat placed under cargo to raise the friction between the cargo and the floor or deck. Higher friction lowers the securing force needed from blocking and lashing.
Step 6: Adjust the method for flat racks and open tops
On flat racks and open tops, most of the restraint comes from lashing and deck blocking, because the container has no walls on a flat rack and no roof on an open top. Oversized cargo on these containers also needs weather protection and careful lifting.
Secure flat rack cargo with lashing and deck blocking
A flat rack has end walls and a deck but no side walls or roof. Block the cargo on the deck against movement, then lash it in every direction to the rack’s lashing points, since there are no side walls to stop sideways movement. Plan for the full sideways force from the CTU Code values, because the lashings carry it all.
Load and cover open tops from above
An open top container has walls and a removable roof, so tall cargo can be loaded by crane from above. Block and brace the cargo against the walls as in a dry container, lash it to the floor anchor points, and secure the tarpaulin so it cannot chafe or fill with water.
Protect exposed cargo from weather and corrosion
Cargo on flat racks and under tarps is exposed to salt air and moisture for the whole voyage. Protect machined surfaces and electronics with corrosion and moisture barriers. Bentley’s interior protection options include VCI shrink wrap, VCI poly and emitters, moisture barrier foil and desiccants.
Bentley’s ocean container services include open top and flat rack loading, along with specialized rigging and heavy lifting, loading and unloading, drayage arrangements and trans-loading. For when moving cargo between transport units saves money, see What Is Transloading?
Step 7: Inspect, photograph and seal the container
Before the doors close, inspect every securing point against the load plan, photograph the finished stow, and record the seal number. The inspection is the last chance to catch a missing brace or a slack lashing before the cargo travels.
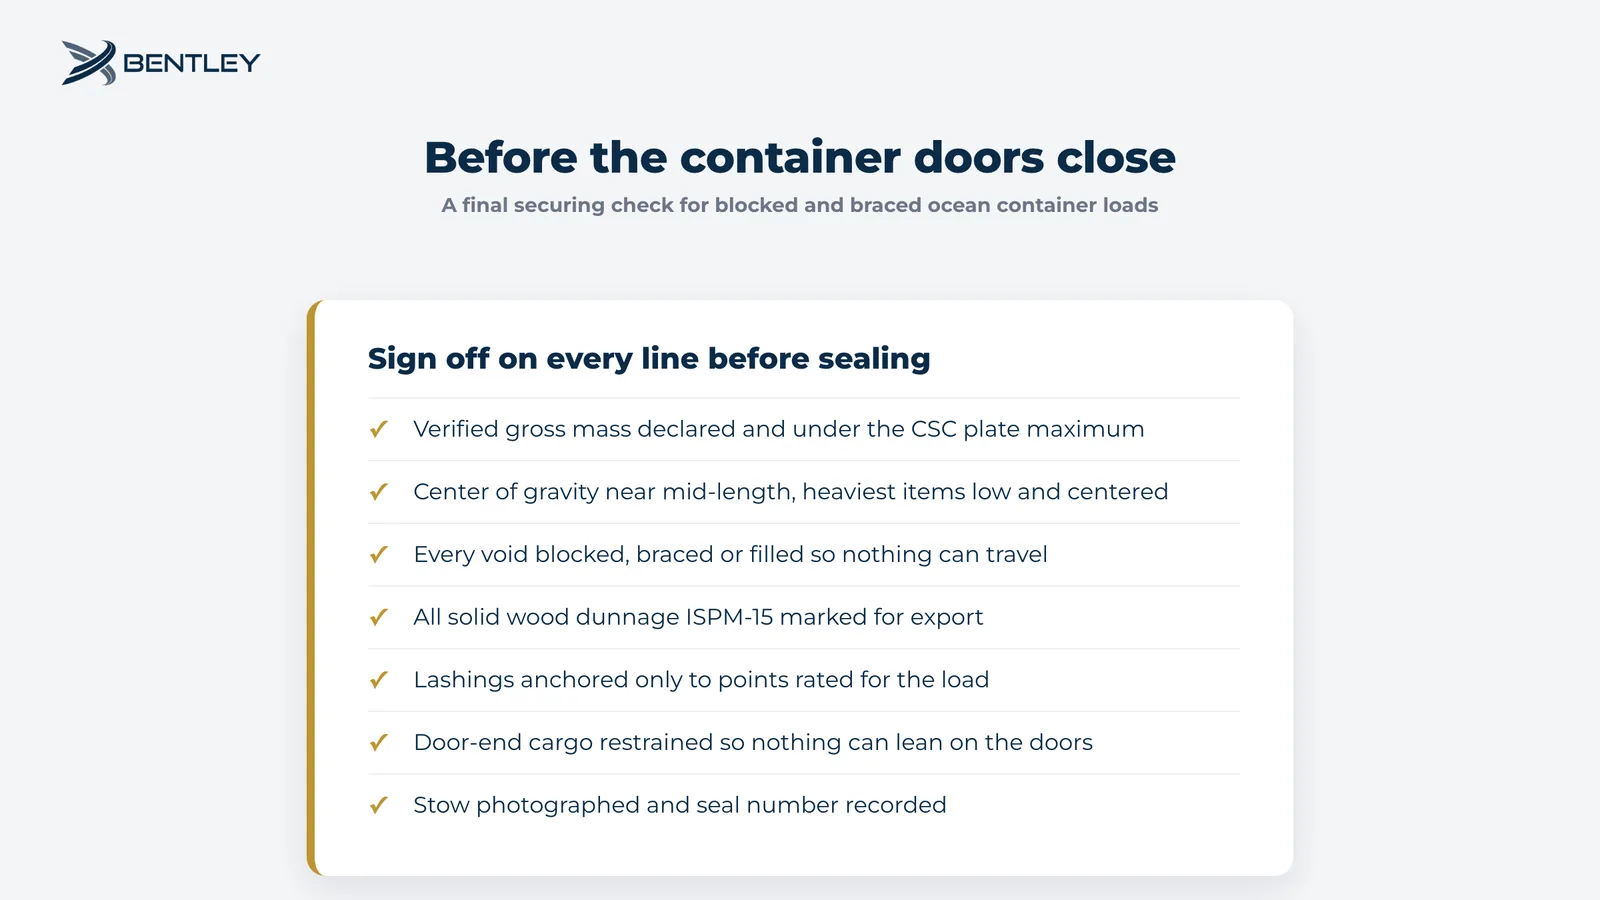
Walk the load with the checklist
Have a second person, other than the crew lead who built the load, walk the container with the load plan and check each line:
- Verified gross mass declared and within the CSC plate maximum.
- Center of gravity near mid-length, with the heaviest items low and centered.
- Every void blocked, braced or filled so nothing can travel.
- All solid wood dunnage ISPM-15 marked for export.
- Lashings anchored only to points rated for the load, and tensioned evenly.
- Door-end cargo restrained by a gate so nothing can lean on the doors.
- Stow photographed and seal number recorded.
Photograph the stow and record the seal
Photograph the load from the door end, from each side where visible, and close up at critical blocking, bracing and lashing points. Record the seal number on the shipping documents. If a claim arises at destination, those photos show how the cargo left your dock.
Re-check after the first road leg on long drayage
On long road moves to the port, cargo and lumber can settle. Where it is practical, check lashing tension after the first leg, before the container is handed to the terminal.
What are the most common blocking and bracing mistakes?
The most common blocking and bracing mistakes come from planning for the wrong force or the wrong leg of the trip. Six show up often:
- Planning only for the ocean leg. Road braking puts 0.8 g forward on the cargo, which needs strong blocking at the front wall.
- Blocking against weak points. A block against a thin crate panel or a machine fitting breaks the part before it stops the load.
- Leaving voids. Small gaps let cargo build momentum and break the blocking it eventually hits.
- Using untreated lumber on export loads. Unmarked dunnage can hold an otherwise compliant shipment at the destination port.
- Tying to unrated points. A heavy-rated chain on a light-rated lashing point fails at the lashing point.
- Letting cargo rest on the doors. The doors are not a restraint, and the person opening them carries the risk.
Where to start with your next container load
Start with the load plan. Confirm the container type and its ratings, place the center of gravity, and mark every block, brace and lashing on paper before the container arrives. The rest of the steps follow from that sheet.
If the cargo is heavy, oversized, or headed for a flat rack or open top, bring in a packaging team that handles container loading as a regular service. Bentley World-Packaging loads, blocks and braces containers from its Milwaukee facilities and from Baltimore, including a facility at the Shipyard at TradePoint Atlantic, with large drive-in doors and overhead cranes for big parts. See the Baltimore, Maryland locations for the port-side facilities.
Have cargo that has to arrive intact and compliant?
Send us the dimensions, weight and destination, and we will plan the blocking, bracing and container load for your shipment.
Related posts
- Export Packing Solutions: Bentley’s Guide to Global Shipment Success
- What Is Transloading? How It Works and When It Saves Money
- The Importance of ISPM 15 Compliance